Monday, December 15, 2014

Whipped Peppermint White Hot Chocolate with Chocolate Cream


Whipped Peppermint White Hot Chocolate
Happy Holidays Friends!  Hope you are enjoying this wonderful season!  I came up with this recipe for this delicious Whipped Peppermint White Hot Chocolate a few weeks ago and it has been a huge it at my cooking classes and and my friend's cookie exchange last week.  Everyone is asking for the recipe!  Sorry I have been so late in getting it up on the blog!  But I hope you all enjoy it!  You can serve it with or without the Whipped Chocolate Cream on top.  In the picture above I made these adorable snowmen marshmallows to go on top.


Whipped Peppermint White Hot Chocolate

1 11 ounce bag Ghiradelli Chocolate white chips
2 1/2 cups heavy whipping cream, divided
1-3 teaspoons peppermint extract, to taste
2 teaspoons pure vanilla
whole milk, to taste


1. Melt white chocolate chips with 1/2 cup cream in crock pot.  Add peppermint and vanilla.
2. Whip 2 cups whipped cream until fluffy.  Stir whipped cream into melted chocolate mixture.  Stir in whole milk to reach desired taste and heat until hot.  Fill mugs with Whipped Peppermint White hot Chocolate and top with a dollop of Whipped Chocolate Cream.  Sprinkle crushed peppermint over the top and serve with cute stirrer, straw or spoon and a marshmallow.

Whipped Chocolate Cream
2 cups whipping cream
1 cup Hersheys Syrup
1 cup sugar

Whip cream in medium bowl.  As the cream begins to thicken, alternate adding Hersheys syrup and sugar until combined.

Whipped Peppermint White Hot Chocolate With Chocolate Cream

Tuesday, November 18, 2014

Jayne Layne's Pepperoncini Beef with Provolone Hot Sandwiches


Pepperoncini Beef and Provolone Hot Sandwiches

 Jayne treated us to these amazing beef sandwiches the other night for Cooking Group.   This is a great slow cooker recipe...just place the browned beef, pepperocini and garlic in your slow cooker on high...six hours later you will have a wonderful juicy beef roast ready to shred and place on toasted buns.  Kelley and I loved dipping these sandwiches in the rich pan juices for a French Dip like sandwich.  These are scrumptious!   For those of us who weren't home when Jayne brought Cooking Group dinner over...she started it in our slow cooker for us!   Everyday I am reminded about how much I love Cooking Group!  I hope you have started one of your own and love it too!


3 lb. beef roast, seasoned with salt and pepper
13 ounce jar chopped pepperoncini plus liquid
5 large cloves garlic, minced
12 hard rolls, sliced in half

In hot skillet place a little oil.  Brown roast on all sides over medium high heat.  Place roast in crock pot with pepperoncini and juices and minced garlic.  Cook in slow cooker on high for 6 hours.   The simplest way to test when the beef is done is by inserting a fork into the beef.  If it goes in and out easily, it is done!  Shred beef using two forks and stir beef into sauce. 
Toast buns under broiler for 30 seconds until lightly browned.  Spread mayonnaise over inside of buns.  Top buns with shredded beef.  Lay piece of provolone cheese over beef.  Place beef and cheese sandwich under broiler for 30 seconds or until cheese melts.  Add the top bun and serve.  You will love dipping these delicious sandwiches in the pan juices!  Enjoy!

Wednesday, November 5, 2014

Cooking Group ~ Kelley Miller's Easy Tortellini and Spinach Soup


Easy Tortellini and Spinach Soup

A hot bowl of soup on these cold fall and winter nights served with some fresh bread really hits the spot. I love soup!  Don't you?  You know I LOVE trying new recipes...so I was so excited to try Kelley's soup today!  And it's a hit!  It is super fast, easy and delicious so I know you'll love it too!  You can add some cooked chicken to this soup if desired.  If you are adding chicken, add a little extra chicken broth as well. This recipe will serve six.


1 tablespoon butter, or olive oil
4 cloves garlic, minced
2 (14 ounce cans) chicken broth
9 ounce package cheese tortellini
course salt and fresh ground pepper to taste
14 ounce can stewed tomatoes (favorite: Muir Glen Fire Roasted Tomatoes)
1/2 bunch fresh stemmed spinach
handful fresh basil, chopped or 1 teaspoon dried
1/4 cup grated Parmesan cheese, garnish

Melt butter in large pot.  Saute garlic in butter over medium heat for a minute.  Stir in broth and tortellini.  Bring to a boil.  Season with salt and pepper. Simmer 5 minutes.  Add tomatoes, spinach and basil.  Simmer 10 minutes.  Garnish with Parmesan cheese and serve with crusty bread.  Now how easy was that?

Here are all of the ingredients measured and bagged for cooking group.

Wednesday, October 29, 2014

Cooking Group~ Kelley Miller's Shrimp Portifino


Shrimp Portofino


Here's another favorite meal from Cooking Group for you all to try.  Kelly Miller brought this amazing dinner the other night.  It was really pretty fast to prepare and tasted amazing! It's great for a fast weeknight meal but elegant enough for a dinner party too!  I love it!


 5 tablespoons butter, divided
2 cloves garlic, minced
1 lb. large raw  shrimp, peeled and deveined
1/3 cup white wine
3/4 cup cream
scant 1/4 cup lemon juice
2 tablespoons Italian breadcrumbs
4 cups baby spinach
handful of pine nuts for garnish
1 lb. thin spaghetti


Bring a large pot of water to boil and cook the pasta while you are making the shrimp sauce.   In large heavy skillet, melt 2 tablespoons butter, Saute garlic in butter for 30 seconds.  Add shrimp saute for 30 seconds.  Add white wine and saute for 2 minutes, until shrimp are opaque. Remove shrimp from pan and set aside, leaving the sauce in the pan.  Cover shrimp with foil to keep warm. Bring sauce to a simmer and add cream. Simmer 3 minutes. Stir in lemon juice.  Remove from heat and whisk in 3 tablespoons of butter, 1 tablespoon at time until melted.  Season with salt and fresh ground pepper. Stir in bread crumbs. Return to heat and add spinach and cook until spinach wilts, just a minute or two.  Stir in shrimp and serve over hot pasta. Garnish with pine nuts, serve with crusty bread and enjoy! 


Tuesday, October 21, 2014

Dutch Oven Crusty Bread


Dutch Oven Crusty Bread

Our visit home to Salt Lake City over the 4th of July this summer was so much fun!   I always come home with some new favorite recipes and this Dutch Oven Crusty Bread is one of them!  My cute nephew Sam Owens, just started college, and I was so impressed to find out he has become a real bread maker!  He treated us to this family recipe of fresh bread every day!  Every night he would quickly stir together this bread dough and let it sit overnight on the counter.  In the morning, he would bake his bread and we would quickly eat it all up!  Sam's bread is so fantastic and so simple, I had to have him give me a demonstration and share his recipe with me!  Sam demonstrated just how quick you can throw this bread together, no kneading required!  It's just a quick stir and then let the dough stand and rise at room temperature for 12-24 hours before baking in a hot dutch oven.  How easy is that?!  How delicious?  Make it and you'll see!     
3 cups unbleached all-purpose flour
1 teaspoon yeast
1 teaspoon salt
1 1/2 cups warm water

In medium mixing bowl, stir together flour, yeast and salt.  Add warm water and stir with wooden spoon just until mixed.  Cover with a piece of plastic wrap and let sit overnight, or for 12-24 hours.  Heat a dutch oven, size 22 -28 Le Cruset, in the oven at 450 degrees for 30 minutes.  Risen dough will be sticky.  Pour risen dough onto heavily floured counter top and lightly shape into a round loaf.  Remove hot pot from oven and carefully set dough in pot.  Cover with lid and return to oven to bake at 450 degrees, covered, for 30 minutes.  Remove lid and bake 5-10 more minutes.  Remove from oven and carefully remove bread from pot and place on a cooling rack.  Enjoy this delicious crusty bread hot by itself or with any meal!  

I made this batch of bread with some whole wheat flour.  The recipe calls for white flour, which is my favorite flour to use for this bread.

Monday, October 20, 2014

Cooking Group~ Jayne Layne's Honey Butter Pork Roast

Honey Butter Pork Tenderloin
Jayne Layne brought this delicious dinner tonight.  It was really fast and simple.  She brought a zip lock bag of potatoes, so I could whip up some mashed potatoes while making the roast.  We loved this!  Jayne brought the pork already seasoned and placed in the Pyrex ready for me to cook with the other ingredients measured out.  Can I just say...I am LOVING Cooking Group!!!  And I hope you are too!

1 Pork Roast, seasoned with salt and pepper
3 tablespoons butter
3 tablespoons honey
1/4 cup white wine or 3/4 cup water

Preheat oven to 375 degrees.  In large heavy OVEN PROOF proof skillet, like a Le Cruset skillet, melt butter and honey on stove top.  Brown roast on all sides in the butter and honey. Transfer the skillet with the roast in it, to oven and roast for 15-20 minutes.  Remove skillet and roast from the oven and place roast on a platter.  Cover with foil.  Place skillet with sauce back on stove top and simmer sauce until thickened, about 5 minutes.  Slice roast and place on platter.  Pour sauce over sliced pork roast and serve with mashed potatoes.

Tuesday, October 14, 2014

Cooking Group~ Melanie Bunker's Pasta Milano


Pasta Milano
 Melanie Bunker brought us one of her family's favorites!  We loved it too!

2 boneless, skinless chicken breasts, seasoned with salt and pepper
16 ounces fettuccine pasta or other favorite pasta
2 tablespoons butter
4 cloves garlic, minced
1 cup sun dried tomatoes, chopped
2 cups chicken broth divided
2 cups heavy cream
2 tablespoons vegetable oil
handful fresh basil, chopped

Bring a pot a water to boil.  Prepare pasta according to package directions, while you cook the chicken and make the sauce. In a large skillet, over medium heat heat oil and cook chicken until browned on both sides and cooked through.  While chicken is cooking make sauce.  In a large sauce pan over low heat, melt butter and add garlic. Saute for 30 seconds. Add the tomatoes and 1 1/2 cups of the chicken broth, increase to medium heat and bring to a boil. Reduce heat and simmer uncovered for 10 minutes or until tomatoes are tender.  Add the cream and bring to a boil, stirring. Simmer over medium heat until the sauce is thick enough to coat the back of a wooden spoon.  Season with salt and fresh ground pepper to taste.  When chicken is done cooking, remove it from pan and set aside. Cover to keep warm.  Add 1/2 cup of chicken broth to pan juices and simmer to reduce slightly.  Add this to the cream sauce and stir in the basil. Tear chicken into bite sized pieces and stir into cream sauce.   Serve sauce over pasta and garnish with fresh grated Parmesan.   Serve with plenty of crusty bread.

Here's all of the ingredients Melanie delivered today for Pasta Milano.

Wednesday, October 8, 2014

Cooking Group~ Kelley Miller's Pork Loin with Cherry Wine Sauce

Pork Loin with Cherry Wine Sauce
Pork loin is notoriously a really fast entree to prepare, which is one reason I love to make it. This recipe has an amazing cherry wine sauce which is the real kicker, making this dish really sing!  Kelley Miller wowed us with this delicious meal the other night.  She threw in a bag of new potatoes to go along with the main course.  Kelley had the meat already cut and seasoned in a zip lock bag, the sauce ingredients measured out and in a small plastic container, butter and fresh parsley were also measured out and in small zip lock bags.  The cooking part was simple and fast and tasted positively gourmet!  Hope you enjoy it too.  This would make a great, quick Sunday dinner.


1 cup ruby port or other sweet red wine
1/3 cup dried cherries
4 teaspoons seedless raspberry jam
1 teaspoon Dijon mustard
1 tablespoon vegetable oil
1 1/2 pounds pork tenderloin, trimmed
1/2 teaspoon salt
1/4 teaspoon fresh ground pepper
1 tablespoon butter
fresh parsley to garnish


In a small bowl combine wine, cherries, jam and mustard. Heat oil in large non stick skillet over low.  Heat for 2 minutes.  Cut the pork crosswise into 16 pieces, sprinkle evenly with salt and pepper.  Place pork in hot pan. Cook 4 minutes on each side or until browned.  Remove pork from pan and keep warm. Stir wine mixture into pan, scraping to loosen brown bits.  Increase temperature to high and bring liquid to a boil.  Cook until reduced to 1/2 cup, about 3 minutes.  Remove from heat and stir in butter with a whisk.  Serve sauce over pork, garnish with parsley.  Serve with roasted new potatoes.

Friday, October 3, 2014

"Cooking Group"... Getting Started...Teriyaki Steak Stir Fry


I just started doing this really fun "Cooking Group" with some ADORABLE friends.  They had done this before in their old neighborhood, closer to D.C.  I totally lucked out when they all moved to my neck of the woods, in the countryside!  I had them explain to me what exactly a "cooking group" is, since I was not familiar with the term. They explained to me that it's basically a group of friends who trade off preparing one meal a week for everyone in the group.   That means you only have to think about meal planning for ONE meal during the school week and receive three or four (depending on how many people are in your group) meals delivered to you, so you can quickly cook and enjoy a delicious, hot meal, without all the shopping and menu planning!  I instantly LOVED the idea!  It's such a great way to try all your friends favorite recipes, learn how to make them, and incorporate them into your own repertoire. Plus, your family will love trying new favorite recipes that are already tried and true!  I will be featuring our "Cooking Group" recipes in this section of my blog, so you can enjoy them too!  Hope you enjoy this idea and start a "Cooking Group" of your own!


                           HOW TO GET STARTED...

Step One: Get a group of 4 or 5 friends together who want to join.  We have 4 people in our group and cook Monday through Thursday because Fridays are usually a date night.  We plan out a menu a month or two in advance.  This is to ensure everyone is not making chicken every night of the week!  The idea is to try have one vegetarian, one beef or pork, one seafood one chicken dish a week.

Step Two: Everyone is assigned a day out of the school or work week to cook (prep ingredients) for a main course of their choice for everyone in the group.  Everyone is on their own for side dishes.

Step Three: Everyone needs to purchase 4 or 5 (depending on how many people are in your group) 8x8 inch glass Pyrex storage dishes (oven proof and freezer proof) with lids. These are delivered with the meal every time. This way we all end up sharing the same dishes and everyone has 4 or 5 on hand every week. 

Step Four: On your cooking day you measure, prep and bag all of the ingredients for your entree for the entire group. Place some of the ingredients or the meat portion in the Pyrex dish, as well as in zip lock bags as needed. Place all needed ingredients for the meal in a strong "delivery" bag along with the instructions. 

Step Five: Deliver the bags to each member of the group in the afternoon, generally before the kids get home from school is best, so everyone can throw the meal together in time for dinner.  You don't always have to eat the meal on the day it is delivered.  You can save it for another day if needed, or even freeze it depending on what it is. Remember you don't bring the meal cooked and hot.  You just bring all of the prepped things they will need to make it quickly, or prepared (like lasagna) and ready to cook.

Note:  Kelley Miller makes a habit of making one extra dinner on her day to cook to take to a friend or neighbor in need.  I love that idea!  (Kelley is so awesome!)


Teriyaki Steak Stir Fry
Jayne Layne brought this amazing dinner over the first night of cooking group.  We all loved it, even all of the kids!  Jayne is so talented at everything she does...among many other things she is the co-owner (along with her sister Jennifer) of Buffalo Lane Jewelry...check out their awesome stuff at http://www.buffalolane.com/ ... AND then try her Teriyaki Steak Stir Fry, it's sooooo good!


Stir Fry Sauce
1/4 cup cornstarch
3 teaspoons of canola oil
1/2 teaspoon of grated ginger ( about a 1/2 inch piece)
2-3 large cloves garlic, minced
1/2 cup soy sauce
1/2 cup brown sugar
1/2 teaspoon red pepper flakes
*
2 lbs. steak, thinly sliced
*
1 red or yellow pepper
1/2 lb. mushrooms, sliced
3 large green onions, sliced crosswise into thirds

Make sure steak slices are dry, dry them with some paper towel if needed, and mix them with the cornstarch, until completely coated.  Shake off extra cornstarch.  To make the Stir Fry Sauce: heat a little oil in a large non-stick frying pan or wok and saute garlic and ginger for a minute.  Add the soy sauce, water, brown sugar and red pepper flakes. Cook the sauce for about 2 minutes and transfer to a bowl.  The sauce may still be thin at this point.  Turn up the heat and add a tablespoon of oil to the pan. Add beef and cook for a few minutes until until browned.  Pour the sauce back into the frying pan and let it cook with the meat. Saute peppers, mushrooms and green onions at high heat for a few minutes and stir into sauce and steak.  Serve over cooked rice.


This is how Jayne's meal came delivered...vegetables and steak cut, and liquid ingredients measured. So all I had to do was follow simple instructions for the stir fry and cook the rice.  Notice she sent the recipe with the ingredients as well.  However, we often text each other the recipe as well as any preparation hints.   


Wednesday, October 1, 2014

Fresh Tomatoes and Basil with Hot Pasta

Fresh Tomatoes and Basil with Hot Pasta 

As the garden tomato and basil season winds down, here's one last great recipe for you to help you put your last few garden tomatoes and basil to good use!  My sister in law Dawn Ann shared this recipe with me years ago and it's still a favorite!

12-16 ounces favorite pasta ( i.e.  bow ties, spaghetti, linguine etc.)
1 cup Parmesan Cheese
4 tablespoons olive oil
4-6 cloves garlic, minced
bunch of fresh basil, chopped
4 large tomatoes, chopped
handful of pine nuts or sunflower seeds (optional) 
Cook pasta according to package directions and toss with the remaining ingredients.  Serve with a good crusty bread.

Wednesday, September 10, 2014

Fresh Peach Pie


Fresh Peach Pie
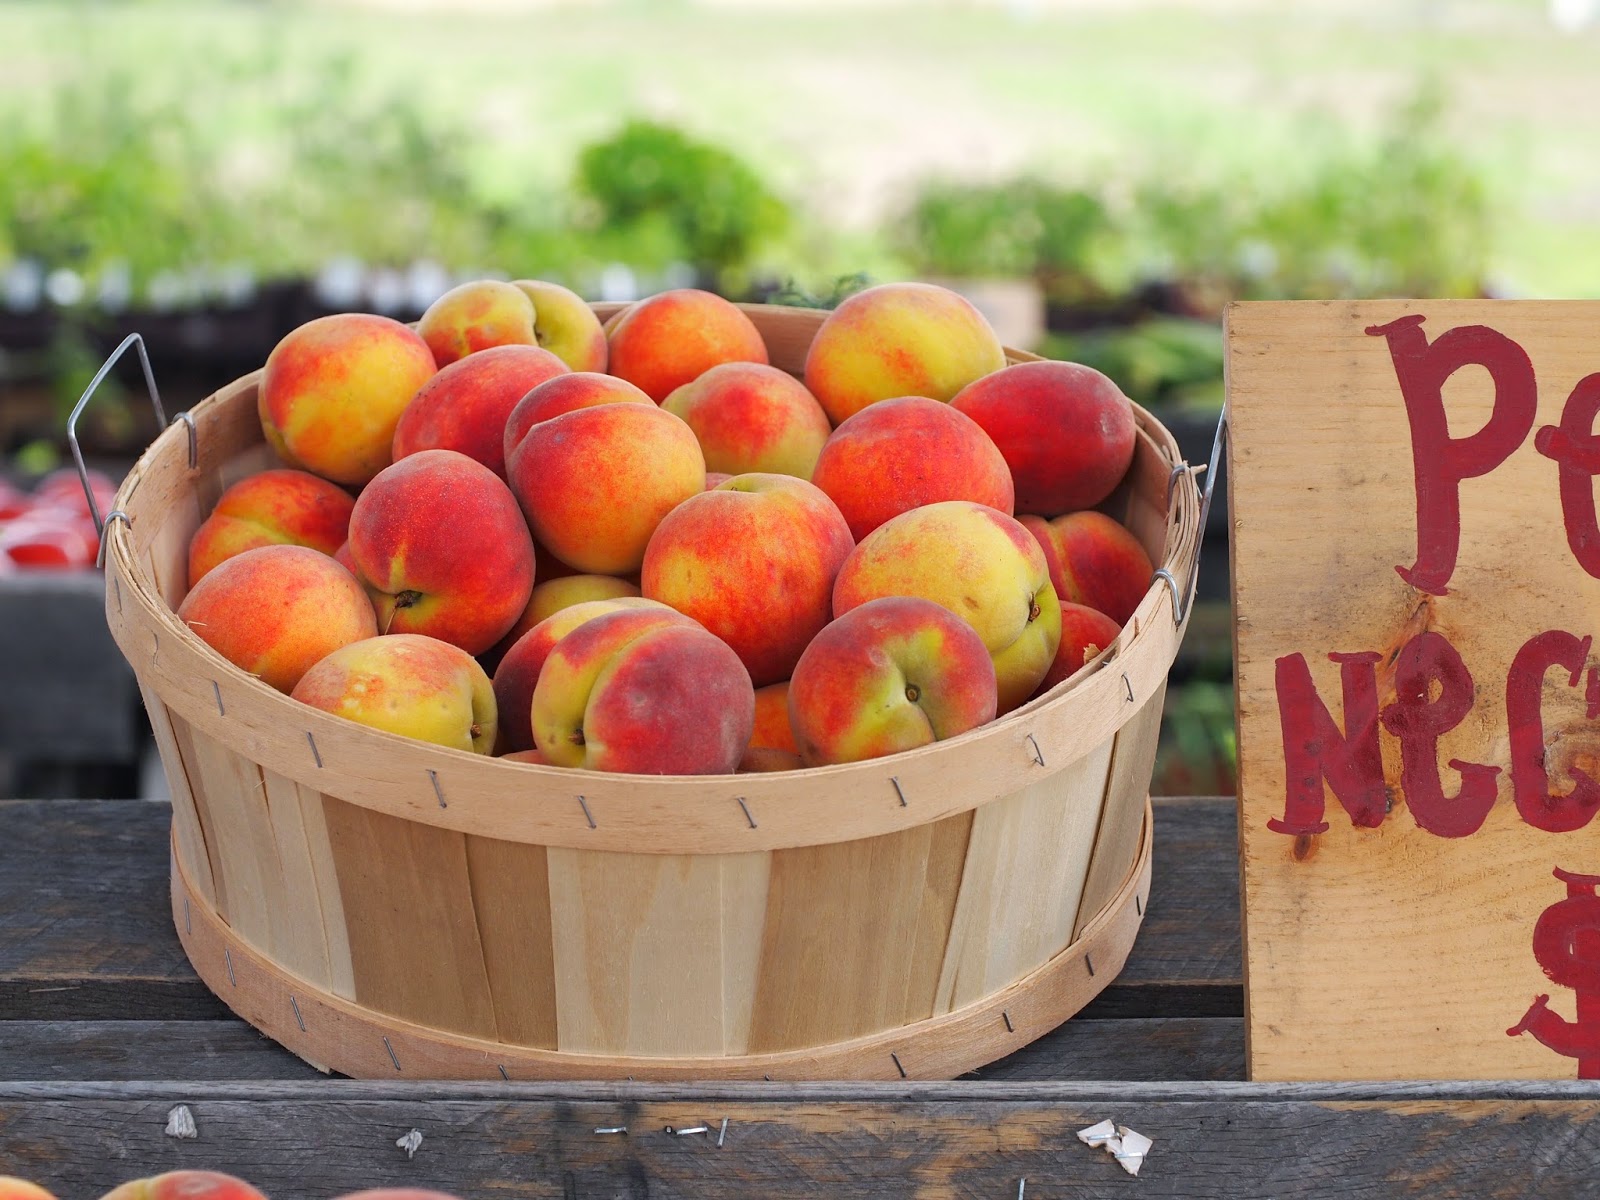
It's peach season!  You can't let summer go by without making this amazing fresh peach pie! This pie is Grandma Carroll’s famous peach pie, made regularly during peach season. It’s nothing short of incredible, and yes I know it has Jell-O in it…it’s still incredible!  My family goes CRAZY for this pie and I know you all will love it too!  I photographed these peaches at local farm just outside Leesburg, Virginia and brought them home to make this pie. Note: This crust recipe makes 2 crusts, (freeze a round of dough if desired), and the peach pie recipe is for 1 peach pie.  

                                        Homemade Pie Crusts
 I admit, sometimes I like to use a store bought piecrust dough. However, they just don’t taste as good as a homemade crust. Pie crust are one of those things you can make on a whim out of basic ingredients in the morning and have a fabulous dessert ready for dinner that evening. Refer to this master recipe for all the piecrusts for the pies in this section of the book.


2 cups sifted all-purpose flour
1 scant teaspoon salt
2/3 cup butter
4-6 tablespoons ice water
1 egg white, slightly beaten

In food processor, mix flour and salt slightly. Dice cold butter, and toss gently in flour, careful of sharp blades.


 With mixer running add ice water by the tablespoonful until mixture comes together in a loose ball.  


Remove from processor and divide dough in half. Form each half into a flat circle, wrap in plastic wrap and refrigerate for a half hour.


Roll out between two sheets of lightly floured plastic wrap into a large circle. Lay circle in pie pan and form into crust. Crimp edges and poke holes with a fork in bottom and side of crust. Brush crusts with egg white.  Bake at 400 degrees for 8-15 minutes or until crust is golden brown. As oven temperatures vary watch crusts closely for an exact baking time. Remove from oven, cool and fill as desired. Makes 2 pie crusts.


                                                        ...now for the pie!

Cream Cheese layer:
4 ounces cream cheese, softened
1/4 cup powdered sugar
1 tablespoon heavy cream


With electric mixer beat cream cheese and powdered sugar and whipping cream together until smooth. Spread in bottom of baked pie crust.  Set aside in the refrigerator.


Peach Filling:
7-9 fresh peaches, peeled and sliced
3 oounce pkg. peach Jell-O
1 cup sugar
2 tablespoons cornstarch
2 cups water
2 tablespoons lemon juice


In saucepan, mix Jell-O, sugar, cornstarch, and water. Boil for 3 minutes. Add lemon juice and stir with a whisk. Place saucepan with Jell-O mixture uncovered in freezer for 45-60 minutes, or until mixture has just set. While Jell-O mixture is thickening, cut up peaches and place in bowl. Stir Jell-O syrup into peaches and spoon into pie shells. If Jell-O sets you can still stir it into peaches until it is evenly distributed and has combined with juices. Be careful not to overfill pie crust.  Cover and refrigerate a few hours or until set. Serve with sweetened whipped cream.  You'll be heaven!


Tuesday, August 26, 2014

Cozumel, Mexico

         Intercontinental Presidente Resort at Cozumel
                     We had a fantastic time in Cozumel and absolutely loved this resort!  
                                
                                     Here's a little taste of our time on Cozumel...


The Virgin Miami Vice, a cross between a pina colada and a strawberry daiquiri, has become my new favorite!

This is the open-air dining pavilion, right on the ocean front.  It's an amazing structure with a dried palm tree leaf roof.  A talented native Mexican guitarist would play every evening, under the pavilion to our enjoyment. There are some fantastic chefs at this restaurant.  We loved the menu and enjoyed some delicious breakfasts here as well.  But we especially enjoyed dining here beside the ocean every evening.


The staff was is great!  Here's a guy cutting open a coconut for me!


 I fell in love with this light and healthy coconut water! 

Take scuba lessons, snorkel, jet ski, or paddle board right on the beach. This is a perfect beach for little kids!  


The Town of Cozumel, is a quick drive from the hotel.  It's a fun and colorful place to walk around and window shop.  We ate at a local favorite, Los Otates, where they make some awesome street tacos.


 The local school children were so cute in their uniforms walking home from school.  This little girl let me take her picture.


                                                                           Raw Cacao Beans


We came upon this fun little Chocolate Shop while walking around Cozumel.  Here they grind their own cacao beans to create these delicious Mexican chocolates.  We enjoyed sampling their beautiful chocolates and ended up coming home with some real cacao beans to show the kids.  Can't wait to grind my cacao beans and make some Mexican brownies, Mexican hot chocolate...


                                                           Pretty Mexican Pastries

                                      Punta Sur State Park, Cozumel, Mexico
This is a beautiful and rugged area.  On the tip of this island you feel like Tom Hanks in Cast Away.  Looking out to the ocean, you feel like you're on a deserted island in the middle of the ocean!   Here there is a natural crocodile lagoon of American crocodiles, but don't be afraid they stay in the lagoon during the day and only come out onto the beach at night!  We took a boat ride in the lagoon and were able to see several large crocodiles.  We had a snorkel guide swim us out to a beautiful reef with an amazing forest of corals, beautiful fish, conch, star fish, and rays. A nearby light house climb offers amazing ocean views. 


                                                                   Adios Cozumel!
Blog Design by Caked Designs